Yesterday I continued working on the inboard and outboard top skins for the left wing. I removed a small amount of material from about 1″ of the forward corner of the inboard and outboard skins where they overlap to help them lay flat. Then after complete deburring, it’s time to dimple.

I got the top inboard skin dimpled. For the most part, I used the Cleveland spring-back dimple dies in the DRDT-2 but on the holes along the forward edge, I used the smaller Avery die so it wouldn’t flatten the slight bend.
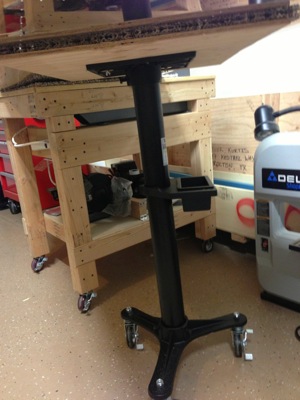
I also added a new fixture to the workshop.

I built the DRDT-2 table expecting to use it in conjunction with the main workbenches. But of course, they are occupied holding the wing so I need something to support skins while dimpling. I purchased a bench grinder stand from Harbor Freight and added castors. I think it was $40. I then attached a piece of the 3/8 plywood (shipping crate top) and carpet and it is a handy movable surface for supporting the skins. I couldn’t have built anything any cheaper and this will also be useful holding the grinder or band saw.
K.C. & Ashley's Airplane
Our Van's RV-14a Build Log

KC,
Just curious….what sort of video equipment are you using to document your project? Most excellent!
Cheers,
Z
It’s an old macbook with an external webcam using an app I found on the internet called “Gawker”. Seems to work good enough for what I need and it’s real simple. -kcb